
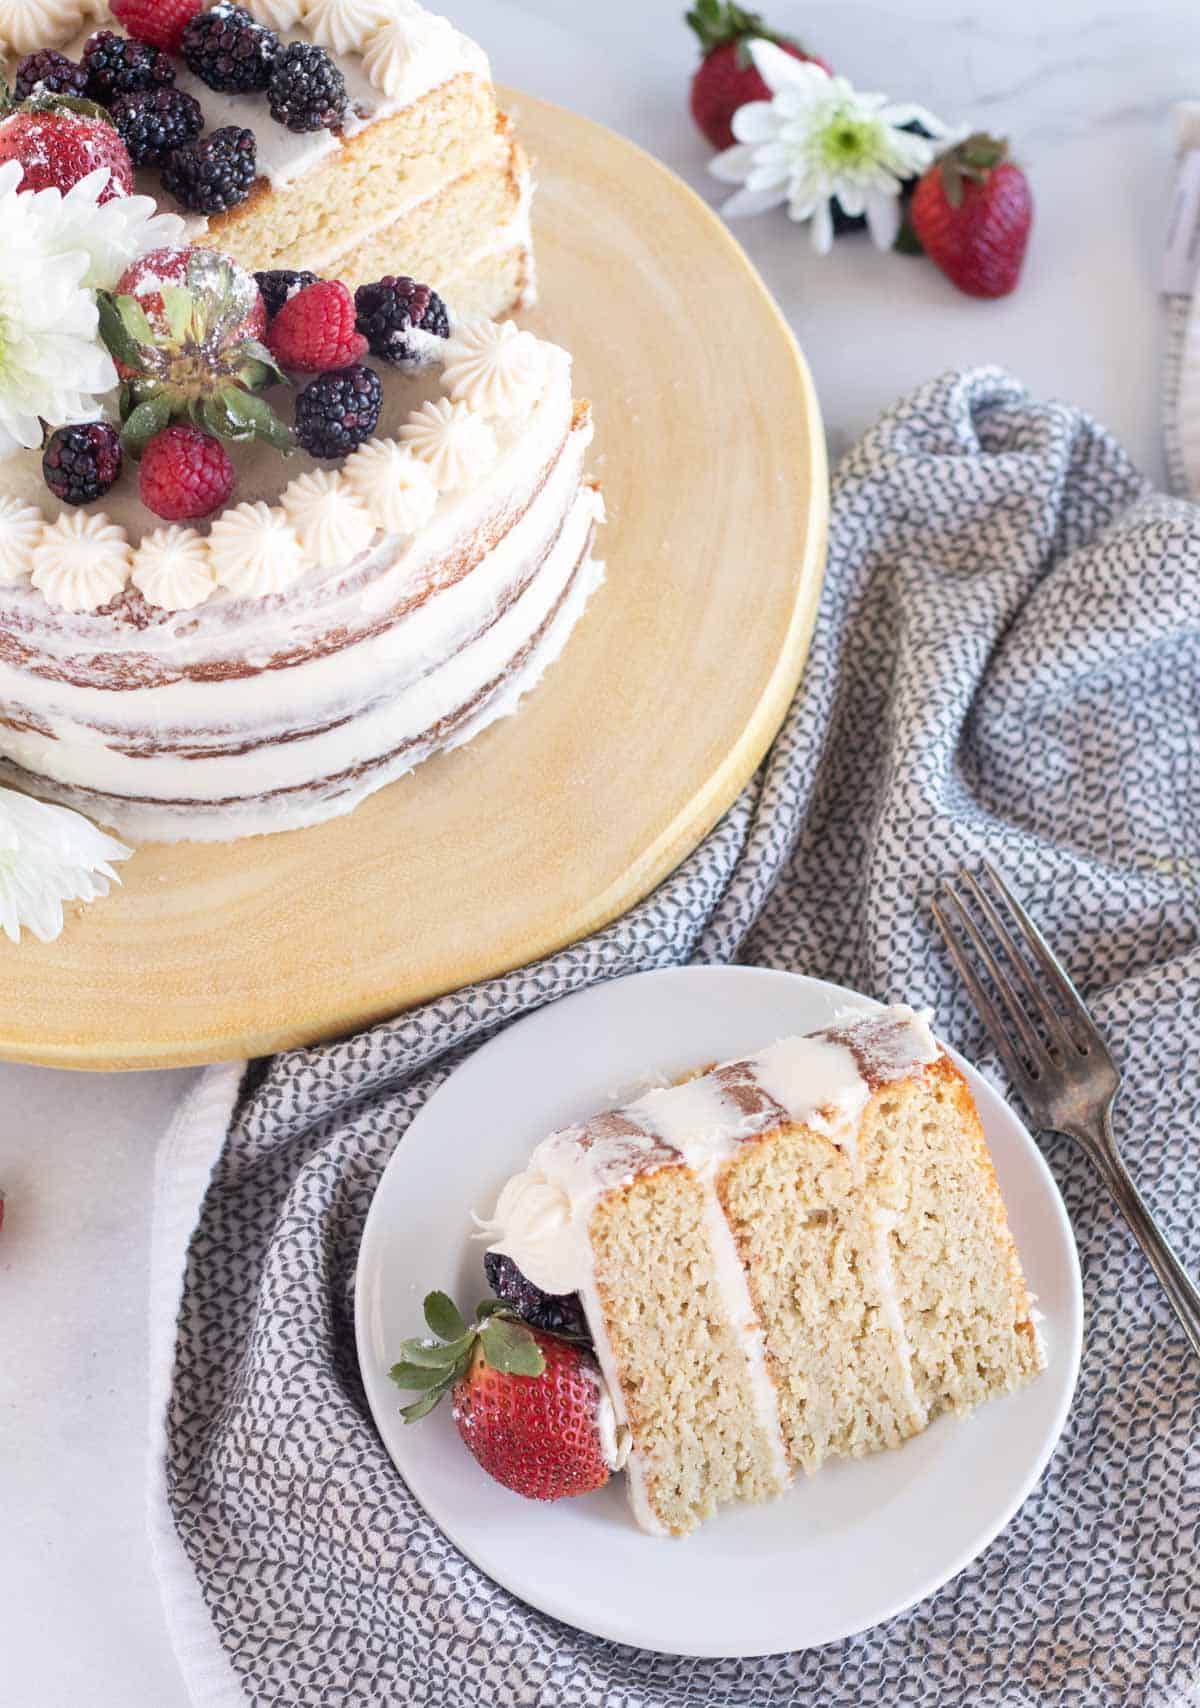
This easy tutorial on how to frost a naked cake or semi-naked cake for beginners is super simple to follow - making even the most cake decorating challenged person able to master it! This gorgeous rustic and chic style features either no frosting on the sides or minimal frosting with the cake layers and fillings peeking through.
Technically speaking, a naked cake has no frosting at all on the sides. Typically when people refer to a naked cake though, they're referring to a semi-naked cake that has a minimal amount of frosting on the sides with the layers and fillings peeking through.
This is also known as "half-dressed" or a "crumb-coated".
Naked cakes are simple, beautiful, rustic, and chic all at the same time. There are many different styles and ways to decorate them, so I'll just show you the basics and then you can add your own touch of creativity!
To begin, you'll need a layer cake recipe and a buttercream recipe. For the cake I recommend my Classic Keto Vanilla Cake or Ultimate Keto Chocolate Cake.
And for the frosting, I recommend this Vanilla Keto Buttercream, Keto Cream Cheese Frosting, or Chocolate Buttercream. For this tutorial, I used my Keto Vanilla Cake And Vanilla Keto Buttercream recipes.
Watch the YouTube video!
Don't forget to check out the step-by-step tutorial to see how easy frosting a cake can be! Watch the full YouTube video here: Cake Frosting Tutorial
Before getting started, here are a few things to keep in mind:
- Have the right tools. You will need either a straight spatula or an offset spatula to apply the frosting and a bench scraper to smooth out the sides. Many people use a turntable, but this is optional and I don't use one for this tutorial. If you do use a turntable, you can use cake circles to transfer the cake to the cake stand after it's frosted.
- Properly prepare the pans. If your cakes stick to the pan, the whole thing will be ruined. You need to line the pans with parchment paper and grease them. To line the pans with parchment paper: 1) Place the pans on a large sheet of parchment paper. 2) Trace the bottom of the pans with a pencil. 3) Cut the parchment paper using the lines you traced. 4) Grease the pan, place the parchment paper in the pan, then grease the parchment paper. This will ensure easy removal and the cakes will slide right out.
- Decide the decor in advance. Before beginning, decide how much frosting you want to use on the sides. Do you want them almost bare or just a little of the cake peeking through? What will you decorate with? There are many options such as fresh flowers, berries, herbs, sprinkles, or small keto treats such as chocolate, cookies, and candies.
- Refrigerate the cakes. Cover the layers tightly with plastic wrap and place them in the fridge for at least an hour before frosting. This will ensure they are completely cool so the frosting sticks.
- Level the cake layers. Before frosting, use a serrated knife to level the tops to ensure they are completely level. Flat layers will add stability to the cake.
- Chill after frosting. Chill in the refrigerator for at least a few hours before cutting. This will ensure the frosting adheres to the cake and makes for a neater slice. After it's set, you can place the cake out at room temperature for the party or gathering.
How to make a piping bag from a plastic bag
If you don’t have a fancy pastry/piping bag, it’s super simple to make one with a Ziplock or plastic bag! Here are the easy steps:
- Cut a very small piece off of the bottom corner of a large plastic baggie then place the piping tip into the cut corner.
- Place the baggie into a cup with the piping tip down.
- Fold the excess baggie over the outside edge of the cup.
- Add frosting.
- Remove the baggie from the cup and push the frosting towards the tip, removing any air.
- While holding the baggie straight up and down, pipe on the frosting. Easy-peasy!
Easy instructions
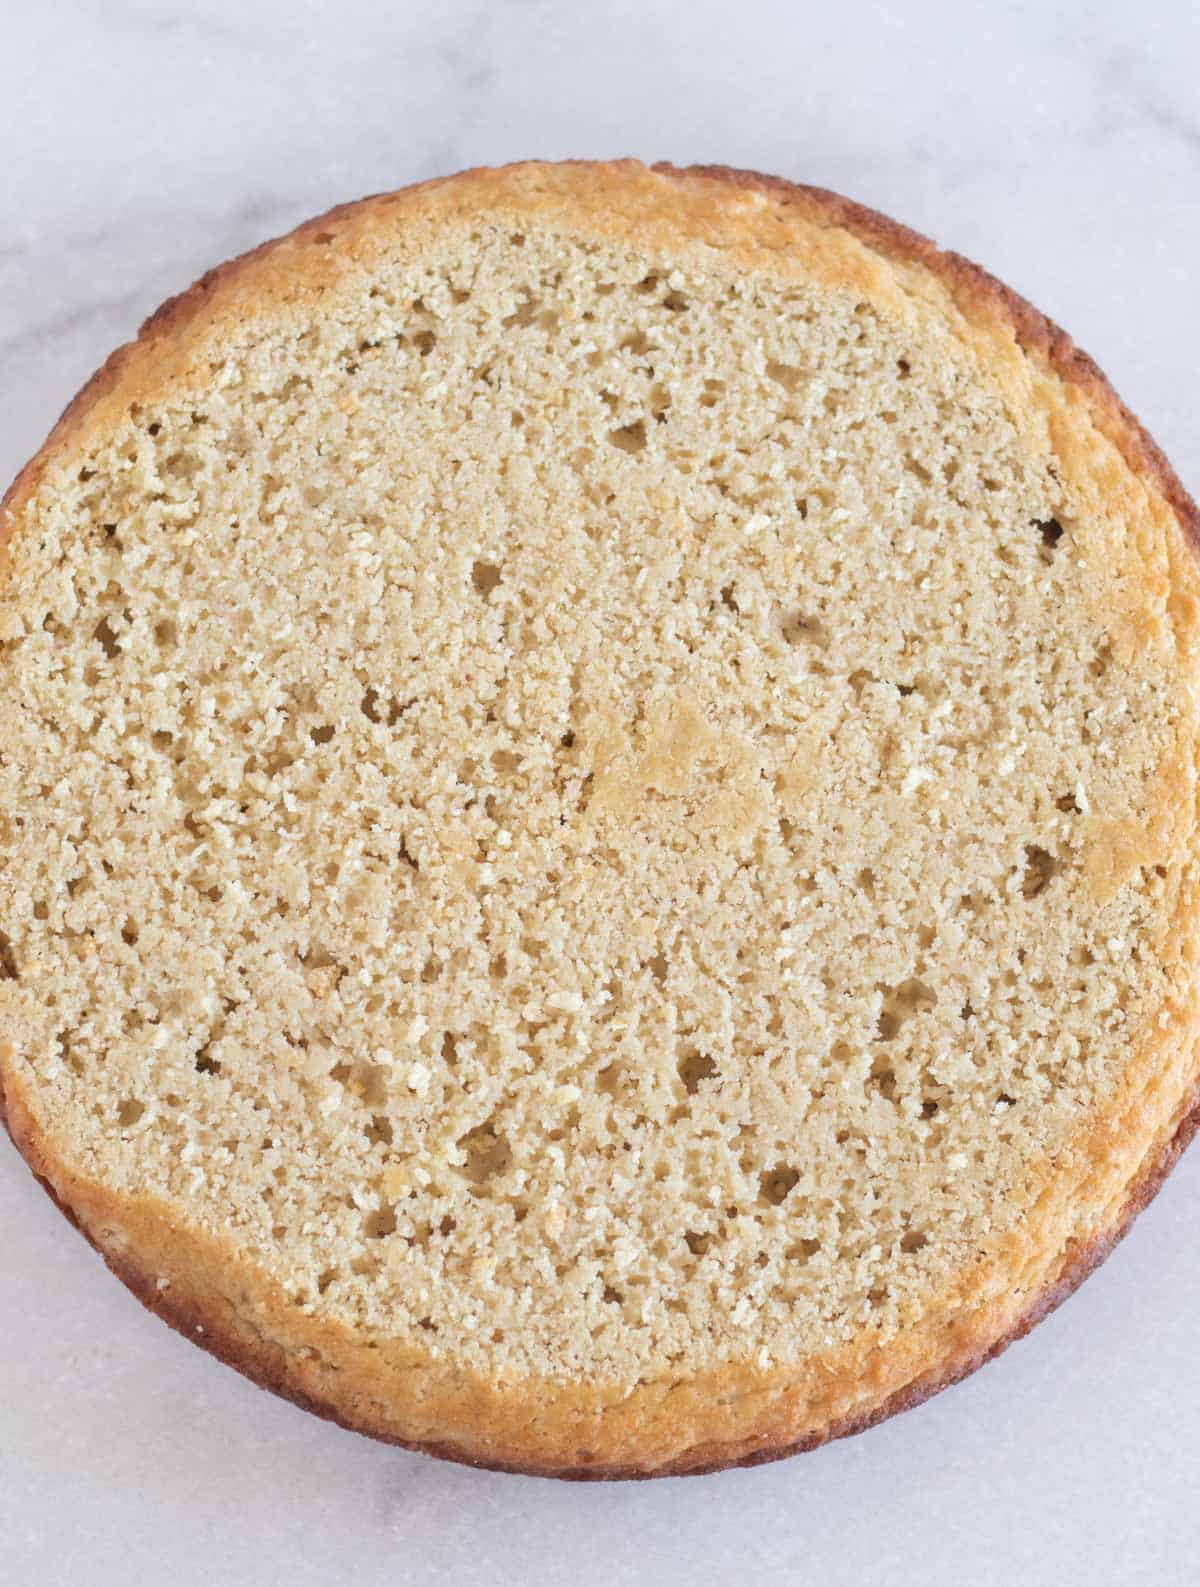
Start by using a serrated knife to level off the top of the cake layers for a flat surface.
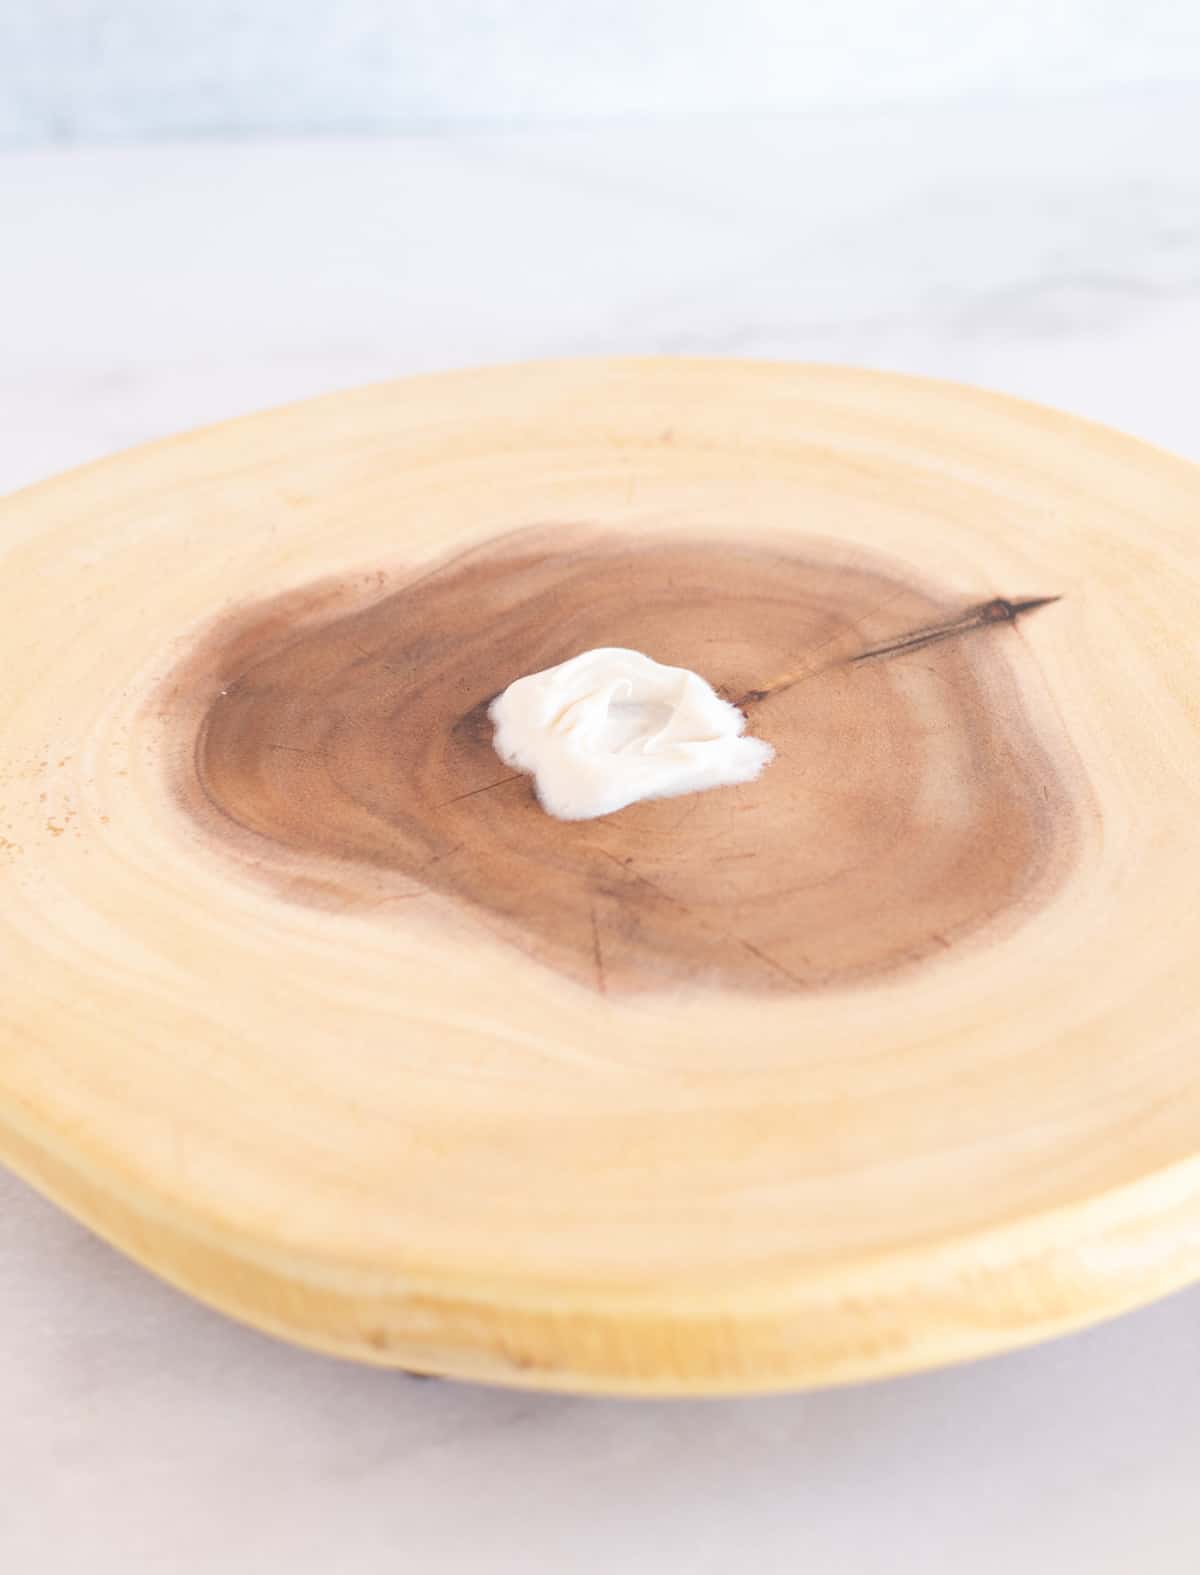
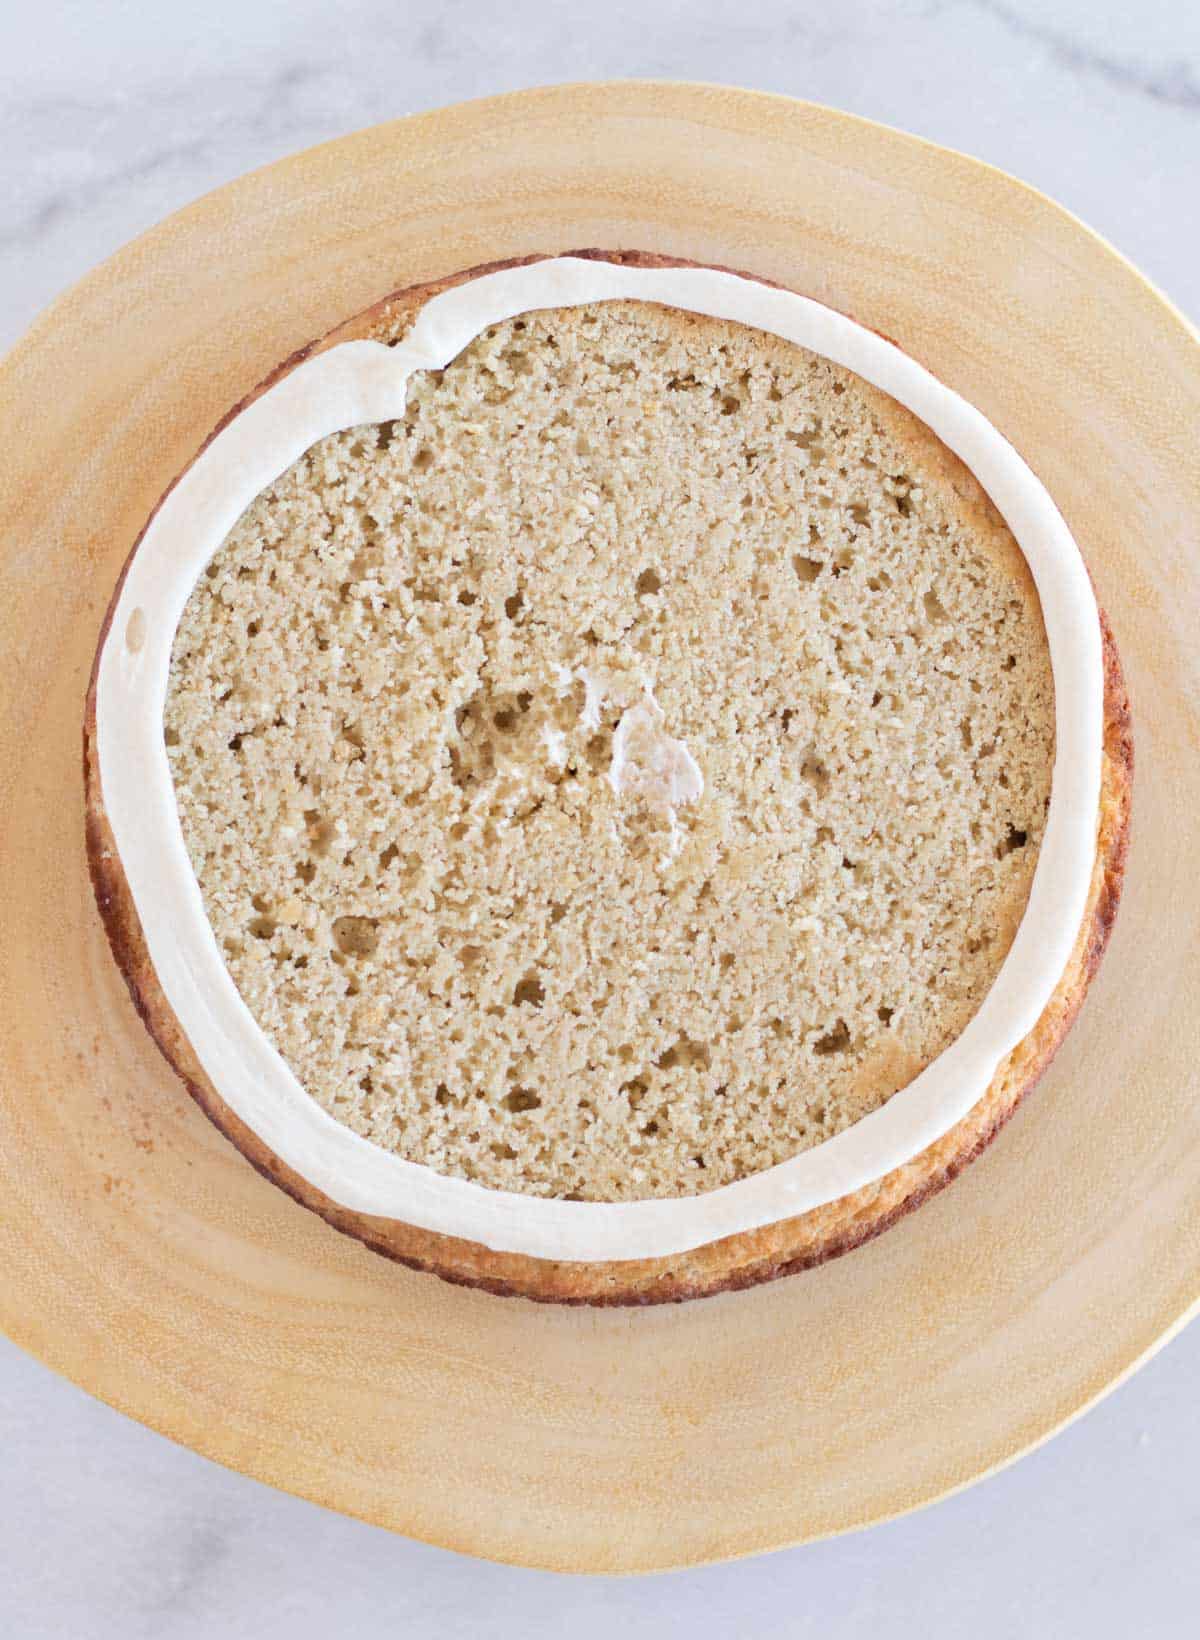
Then, place a small amount of frosting on your cake stand or turntable. This helps the cake stay in place while frosting.
After that, place the first layer on the stand with 4 pieces of parchment paper underneath.
I add parchment paper because I'm SUPER messy and it makes for easy cleanup.
If you're using a turntable, you can skip the parchment paper. Just be sure to place a cake circle underneath so you can easily transfer it to your cake plate or stand after frosting.
I like to pipe frosting around the edge of the layer. While it's not required, it helps me make sure the frosting is even all the way around with a nice edge.
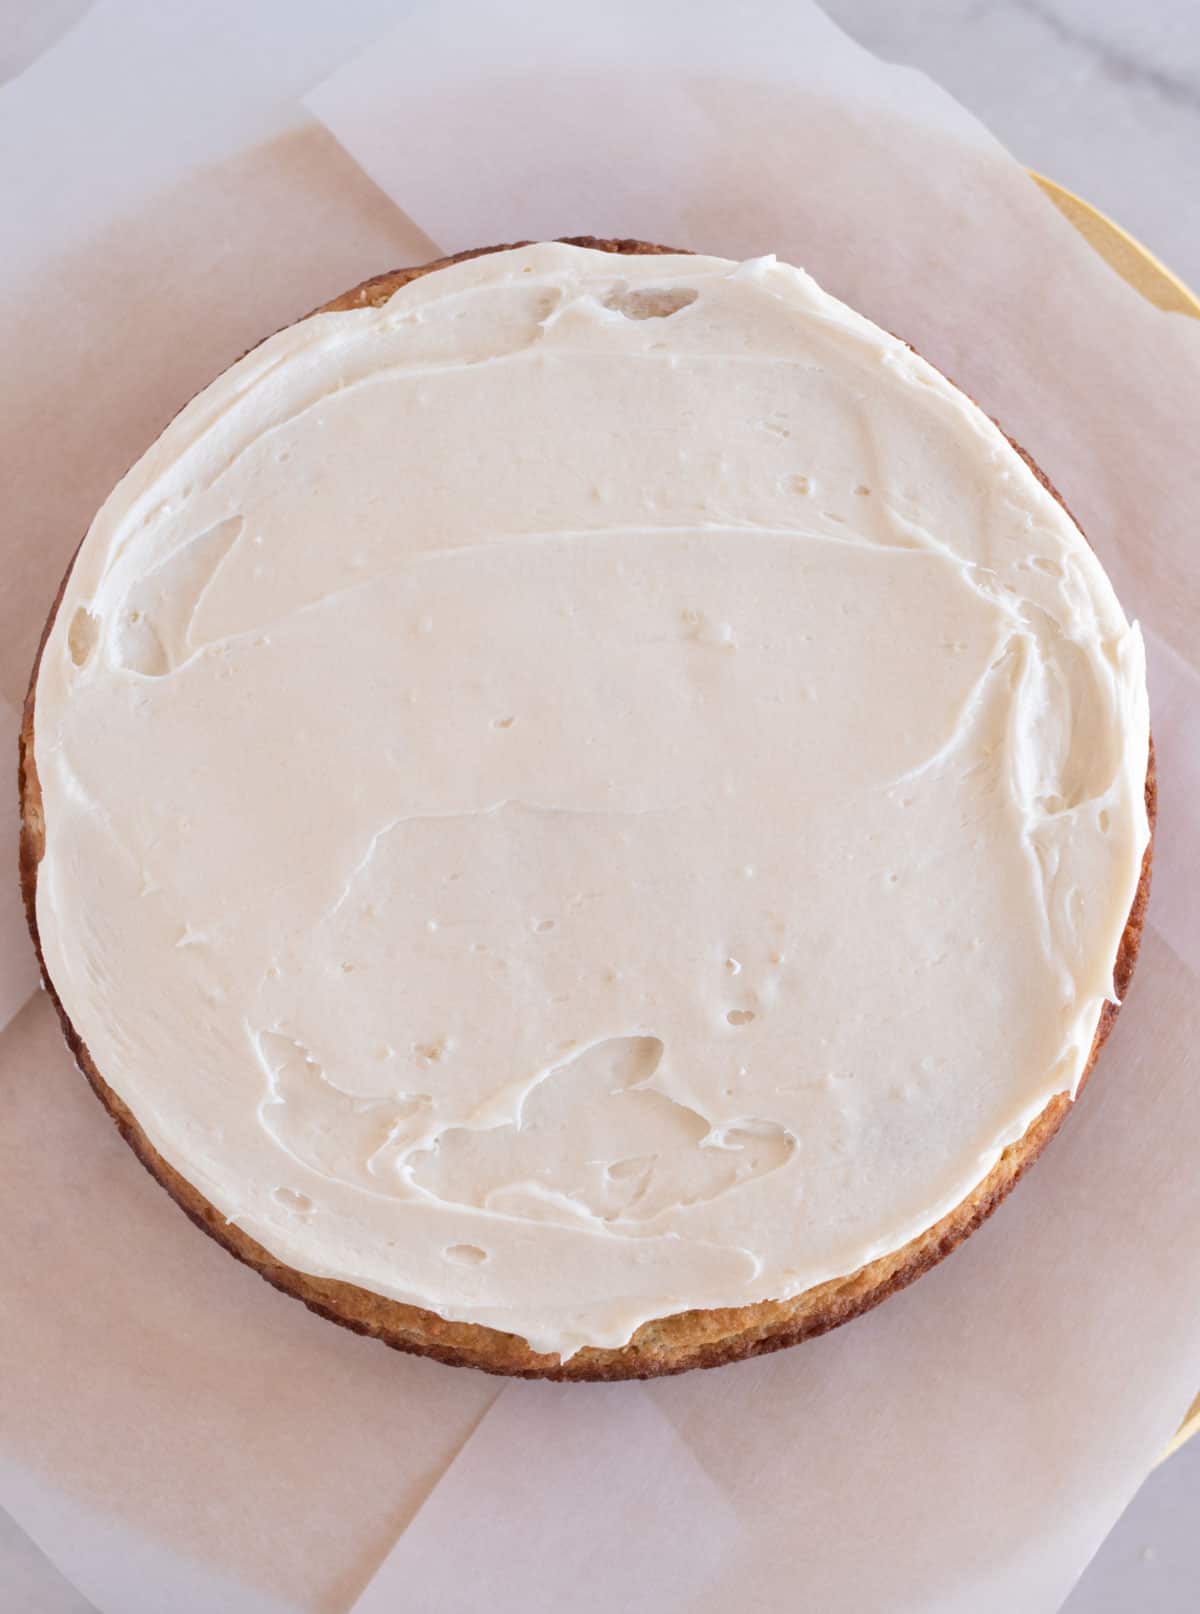
Then use a straight spatula or an off-set spatula to add frosting and evenly fill it in.
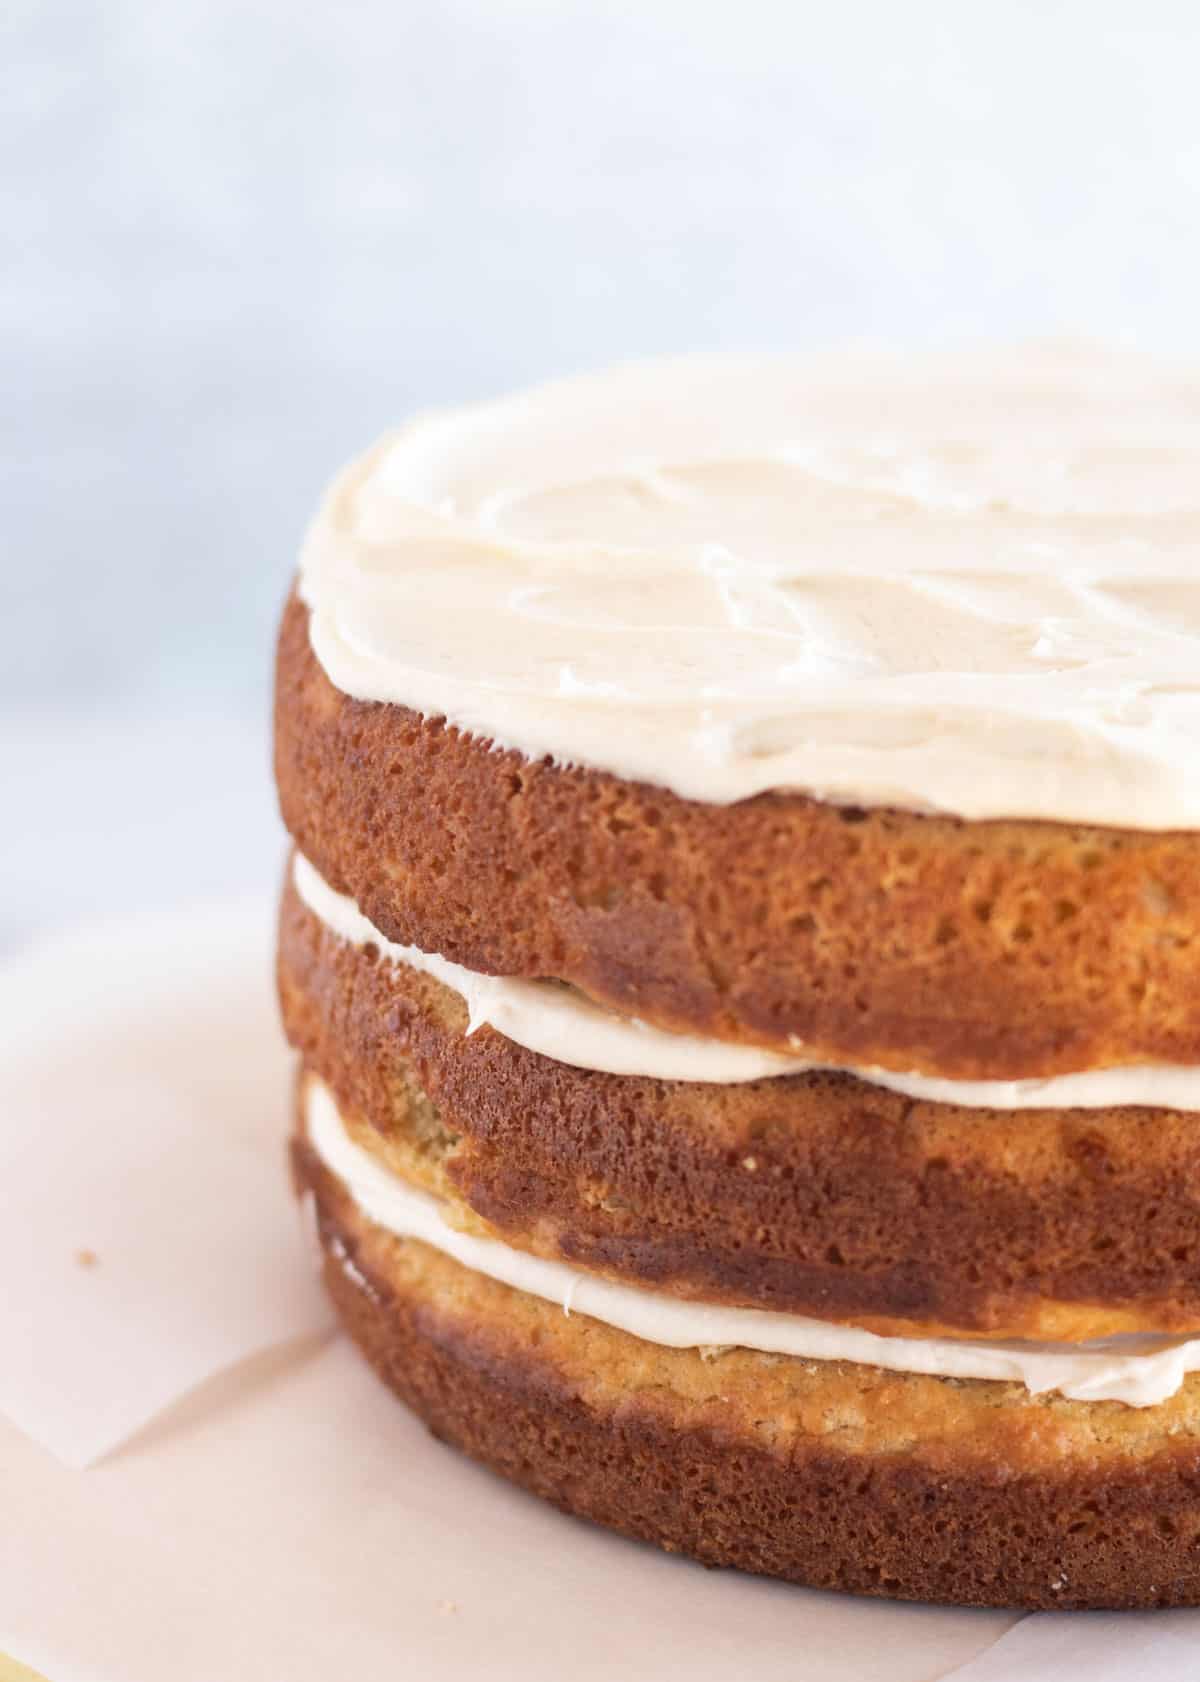
Add the next layer upside down to make for a more level cake. Press it down into the frosting to get out any air bubbles and ensure that it's stacked evenly.
Repeat these steps for each layer, including the top one.
For a naked cake
For a naked cake, stop here. A true naked cake has completely bare sides with no frosting. It's simple and beautiful.
Decorate the top as desired and remove the parchment paper or transfer to a cake stand.
Then, transfer the cake to the fridge for at least an hour or two to allow the frosting to set.
After it's set, place it out at room temperature for the party or gathering and serve.
For a semi-naked cake
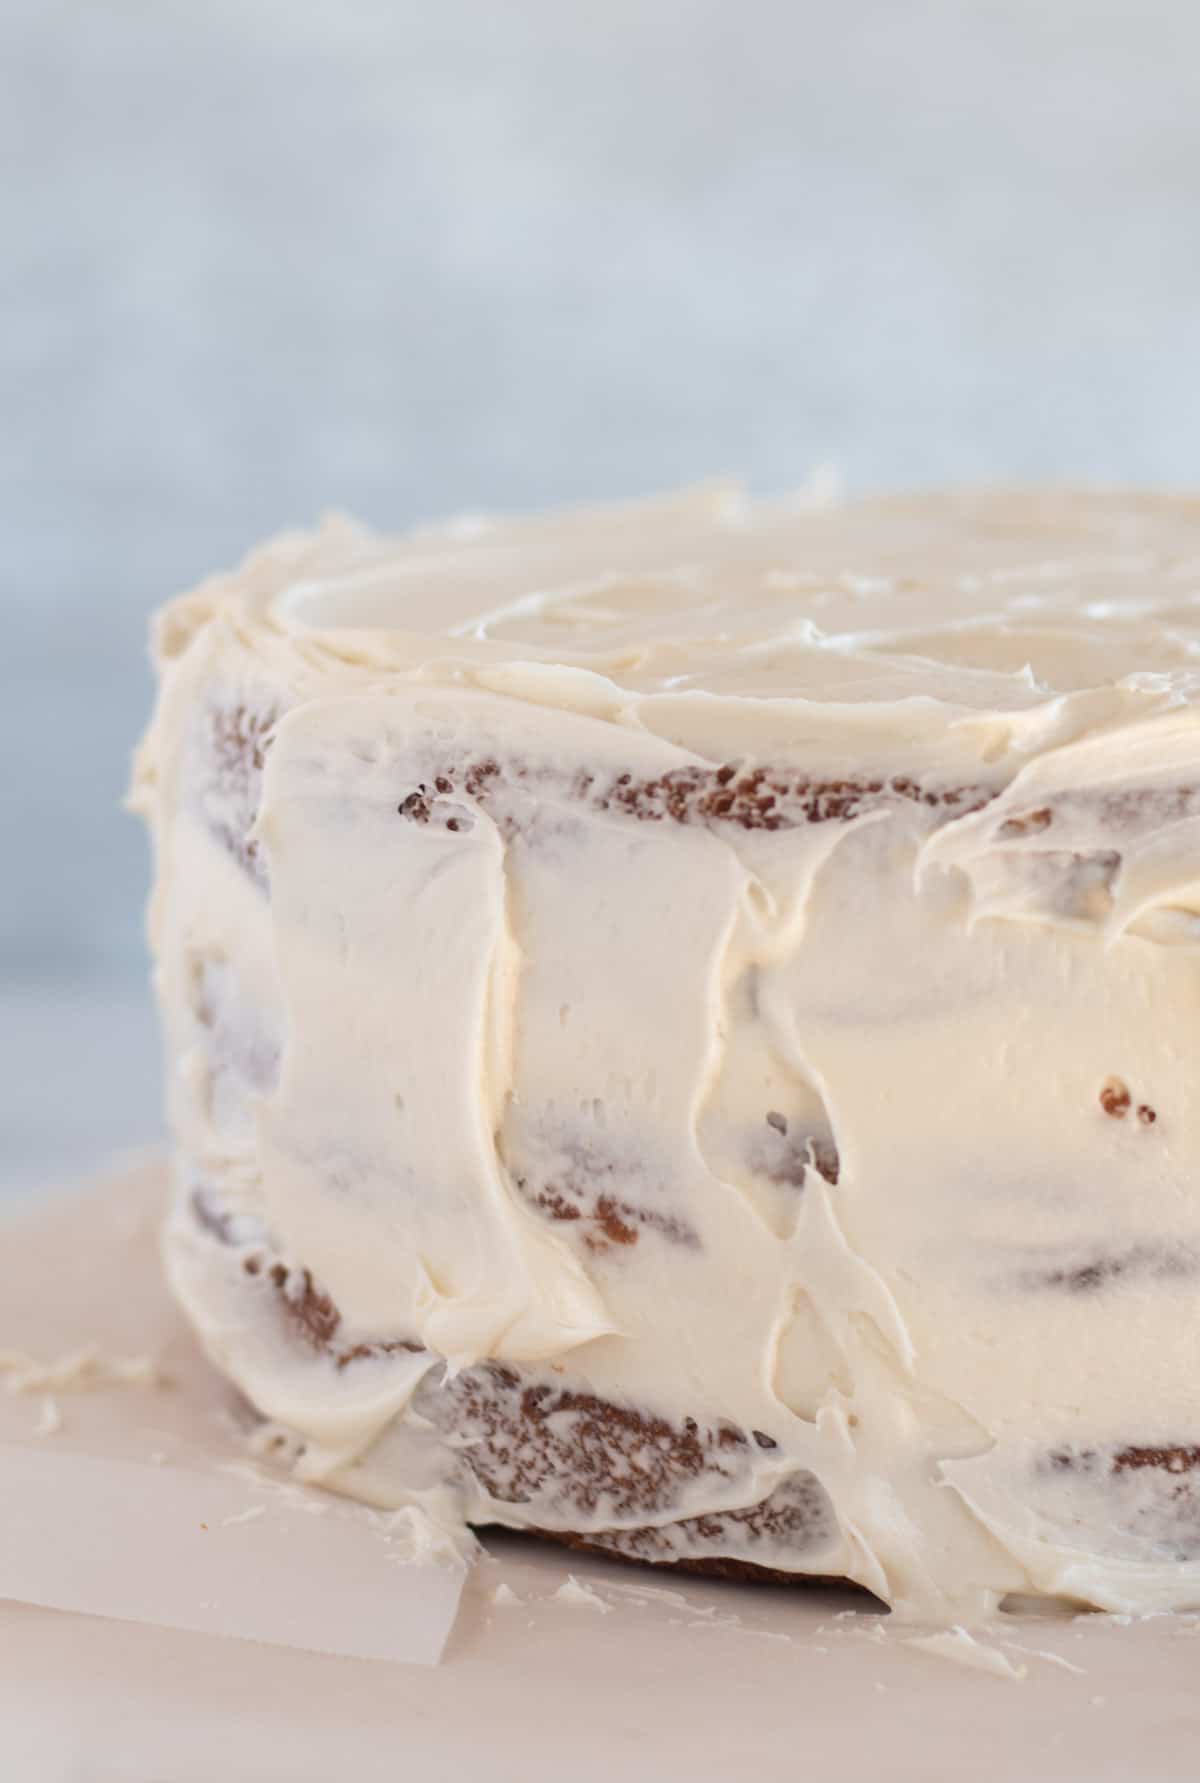
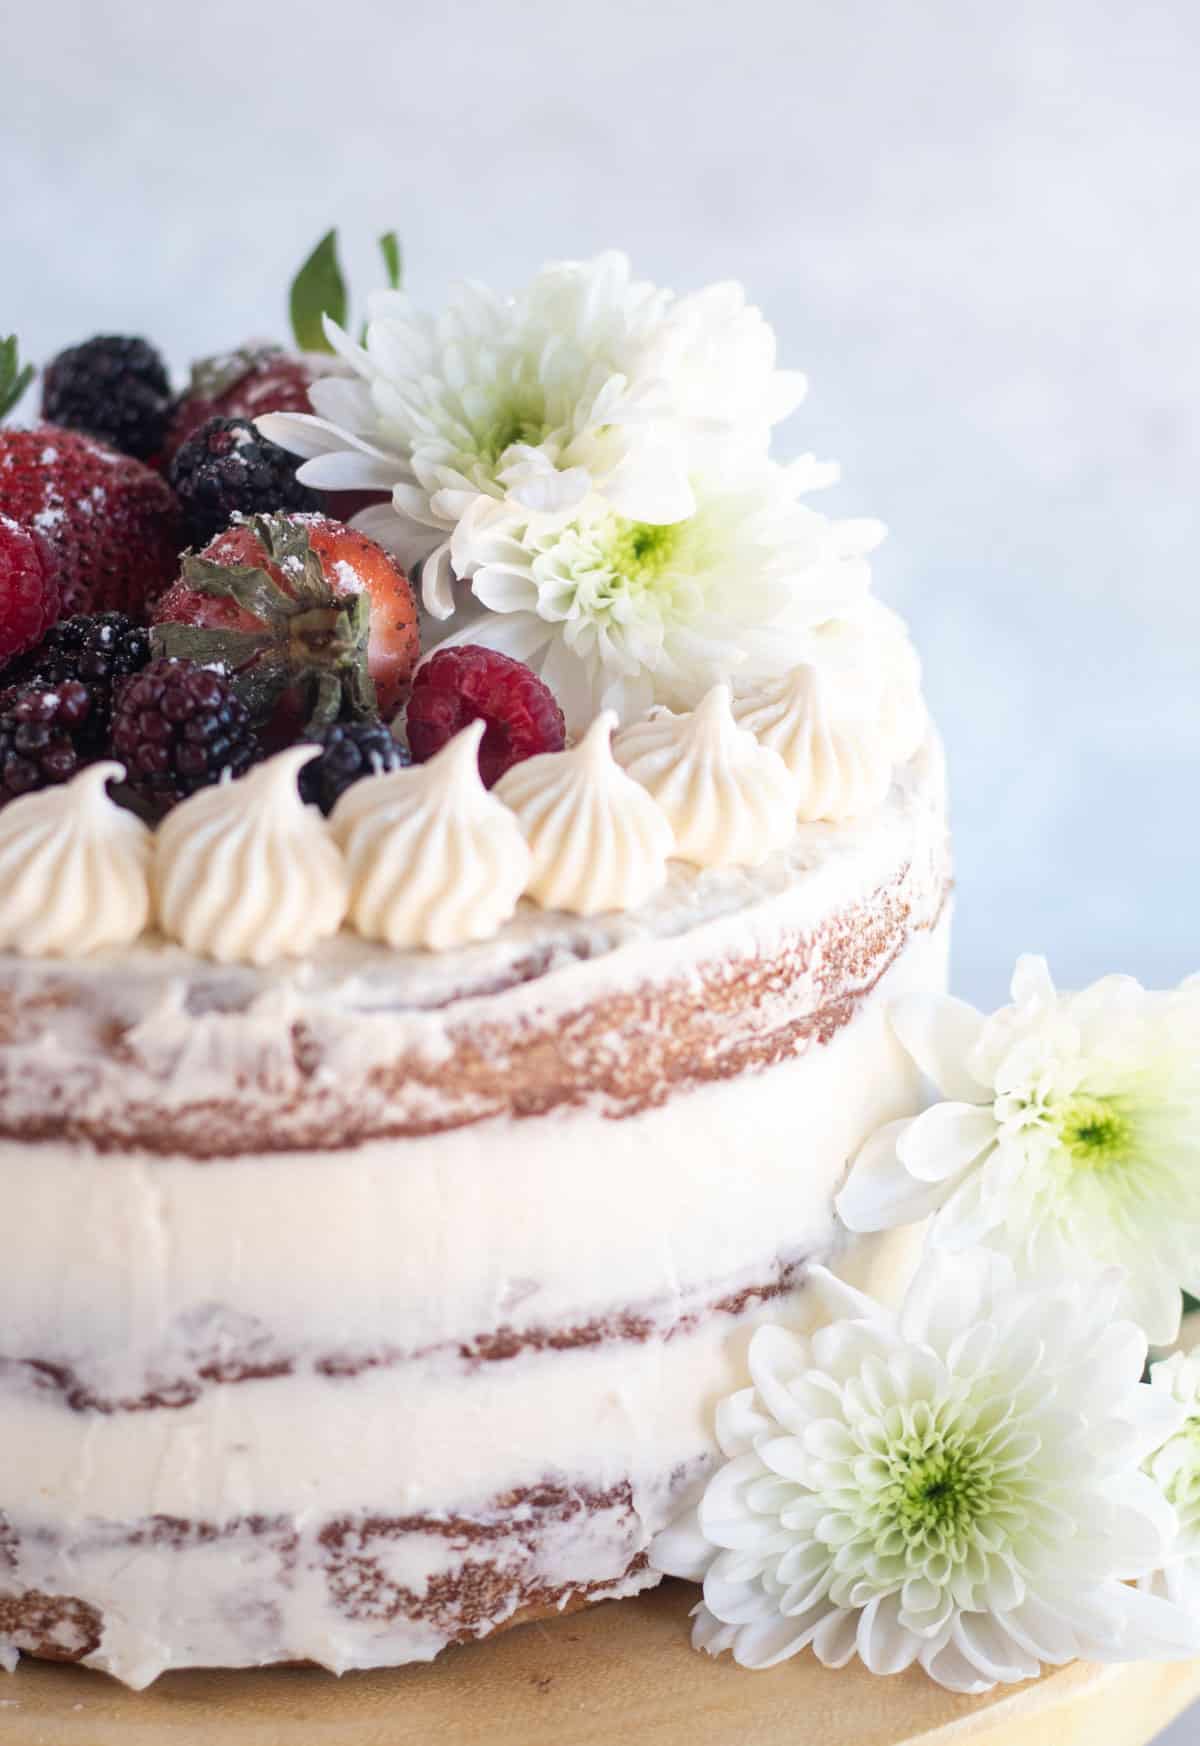
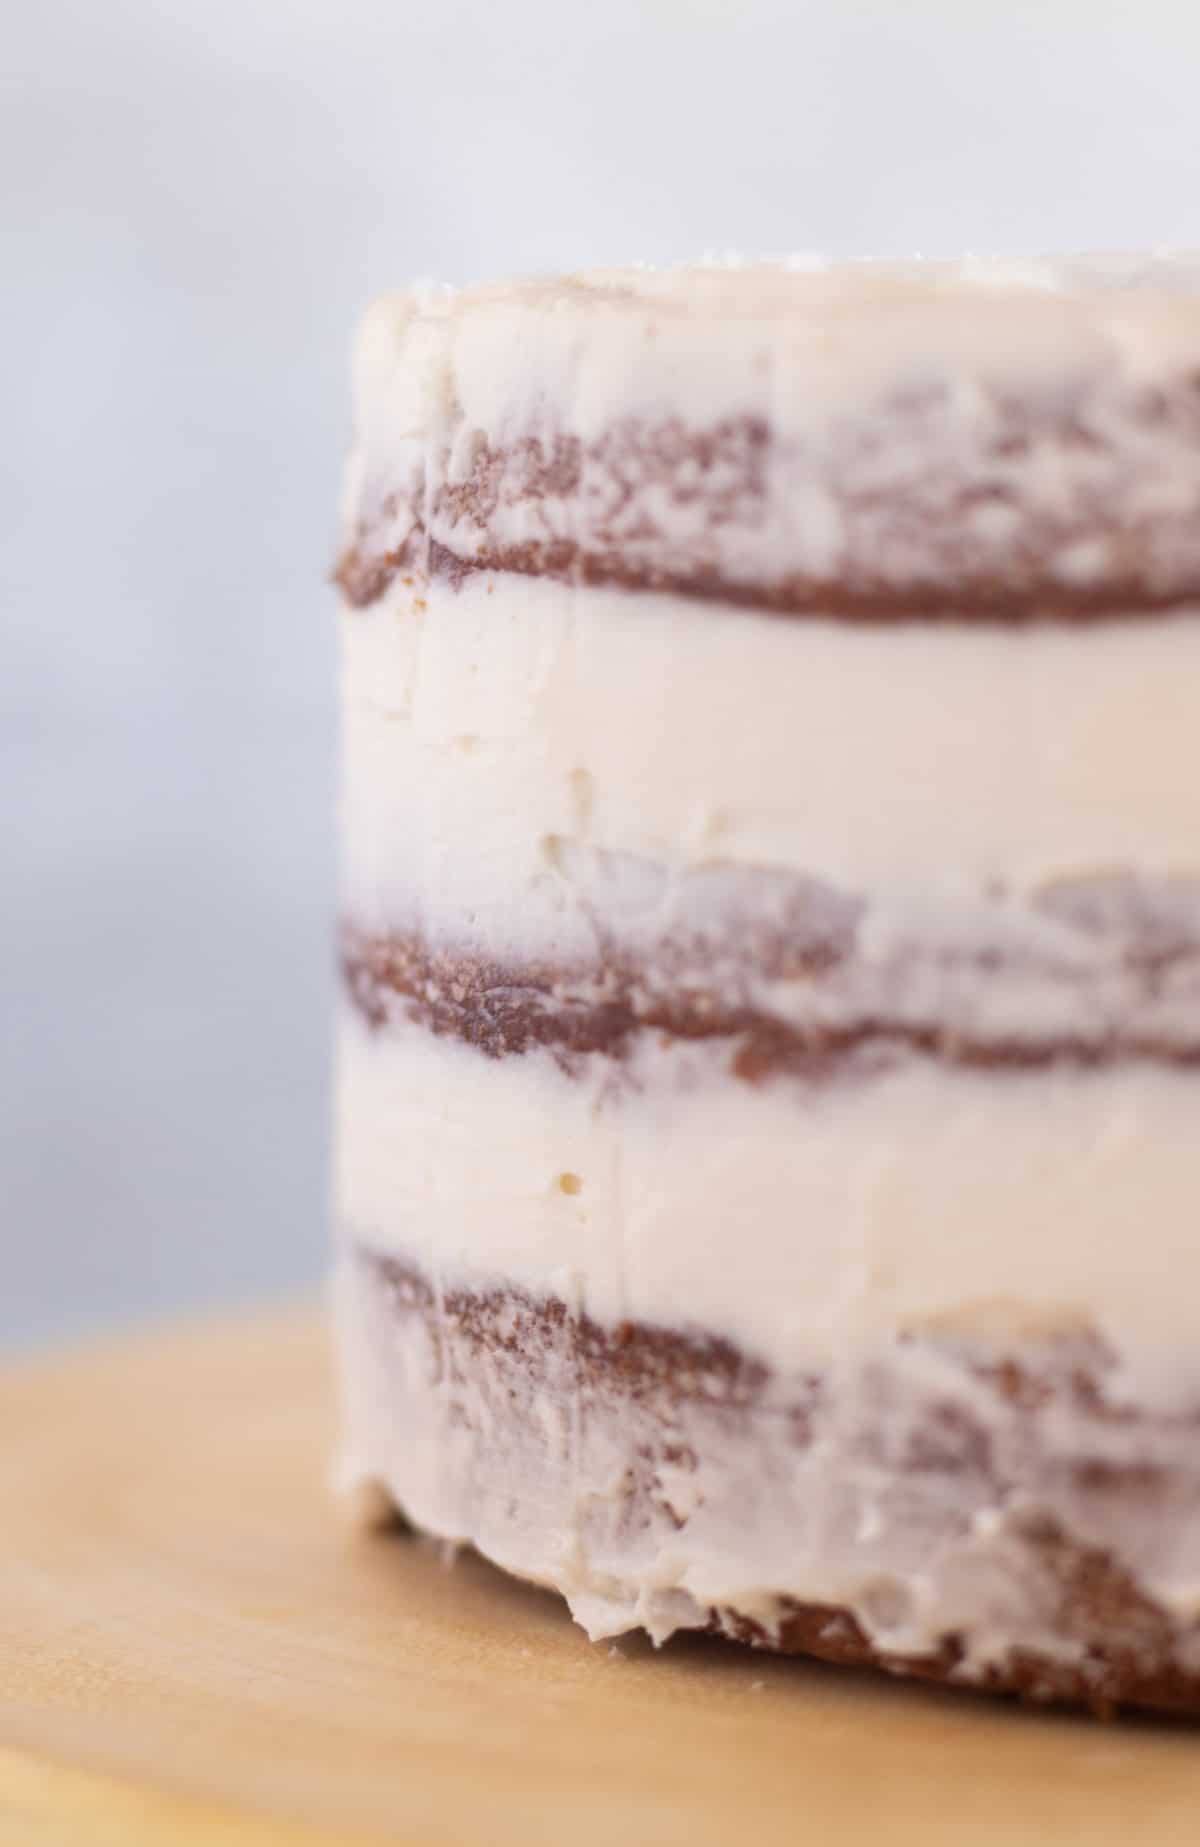
For a semi-naked cake, we'll add minimal frosting to the sides with the cake and fillings peeking through.
To do this, use your spatula to add frosting to the sides, starting at the bottom and working towards the top.
No need to be perfect, and you can add as much or as little as you prefer.
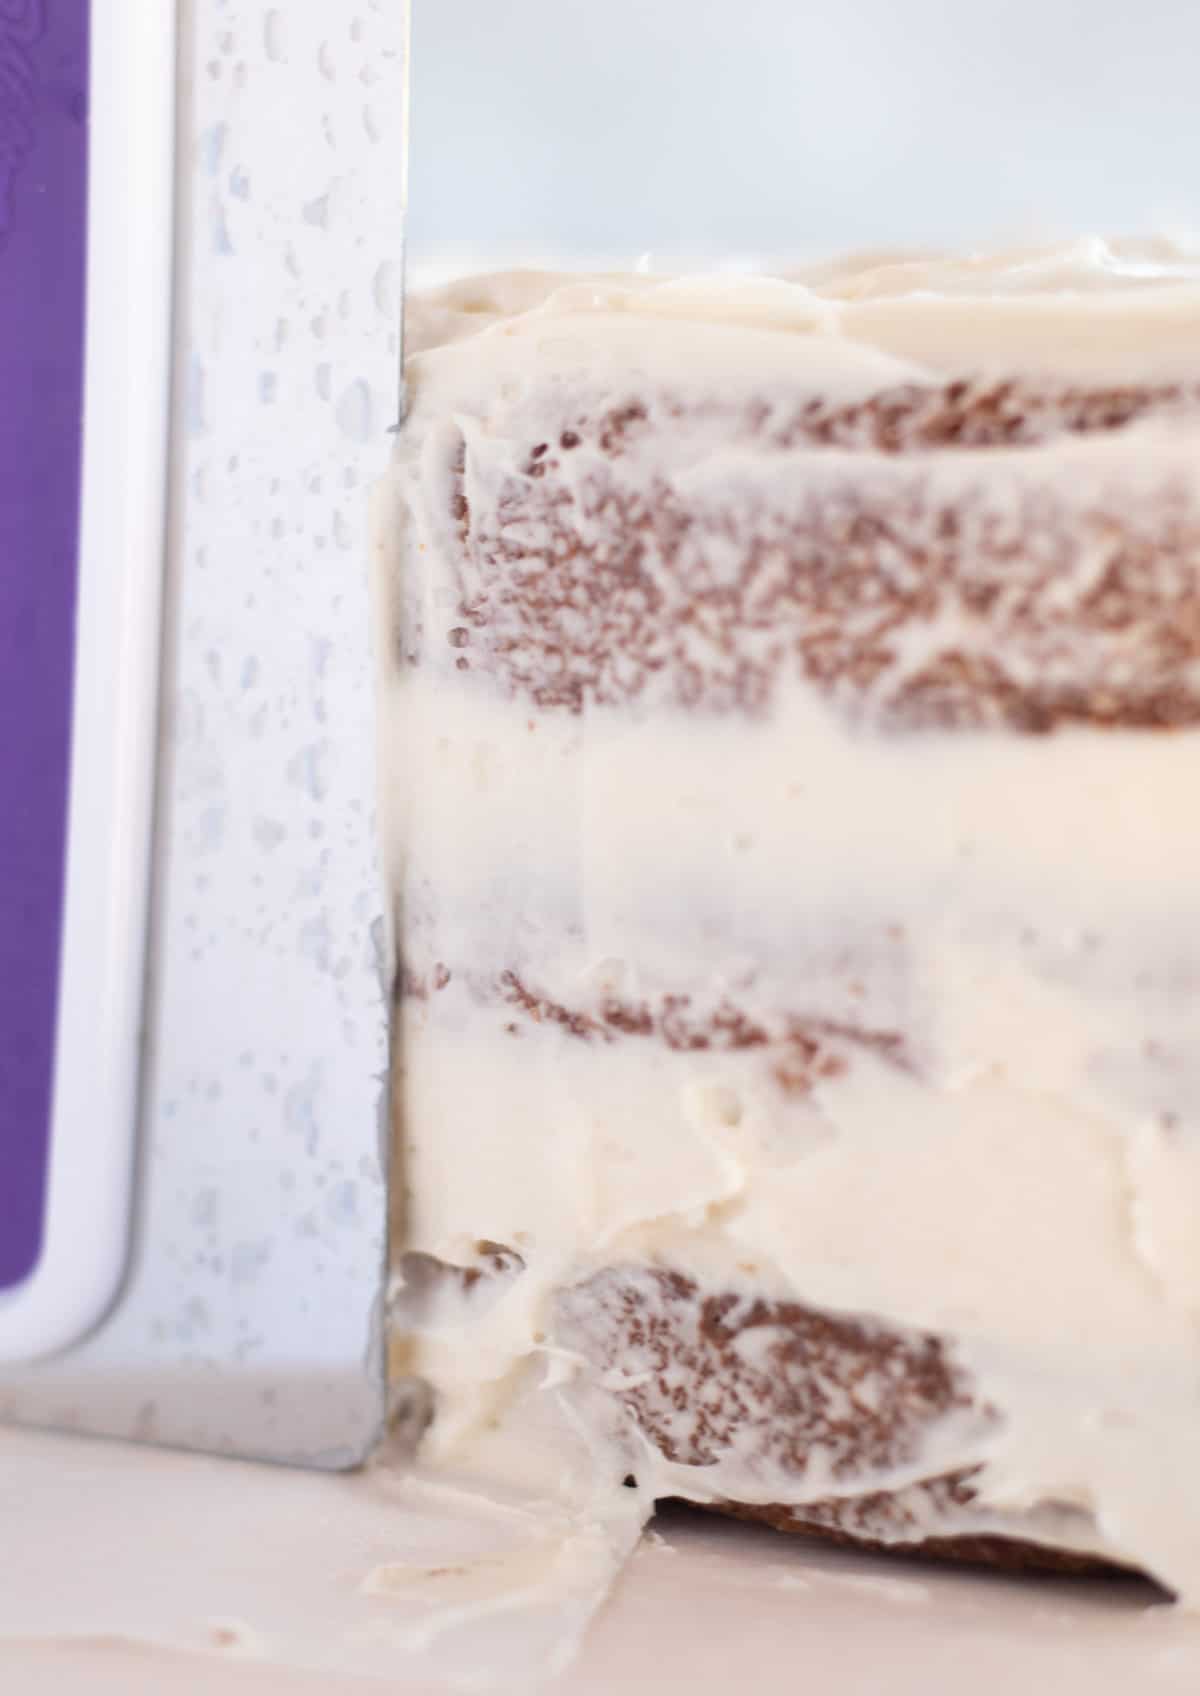
Now for the fun part! Use a bench scraper to smooth out the sides and allow the cake to peek through. Don't push too hard or it may puncture.
When I do this, I work in sections, scraping with my right hand and turning the cake stand with my left. This is where a turntable comes in handy, but if you don't have one like me you can still make it work!
As you scrape, wipe the excess frosting off of the bench scraper into a bowl. If there are holes in the frosting, simply add more with the spatula then smooth it out with the bench scraper until you get the look you want.
The more perpendicular you hold the bench scraper, the more frosting you scrape. The closer you hold it to the cake, the less frosting you scrape and you get more of a smoothing effect.
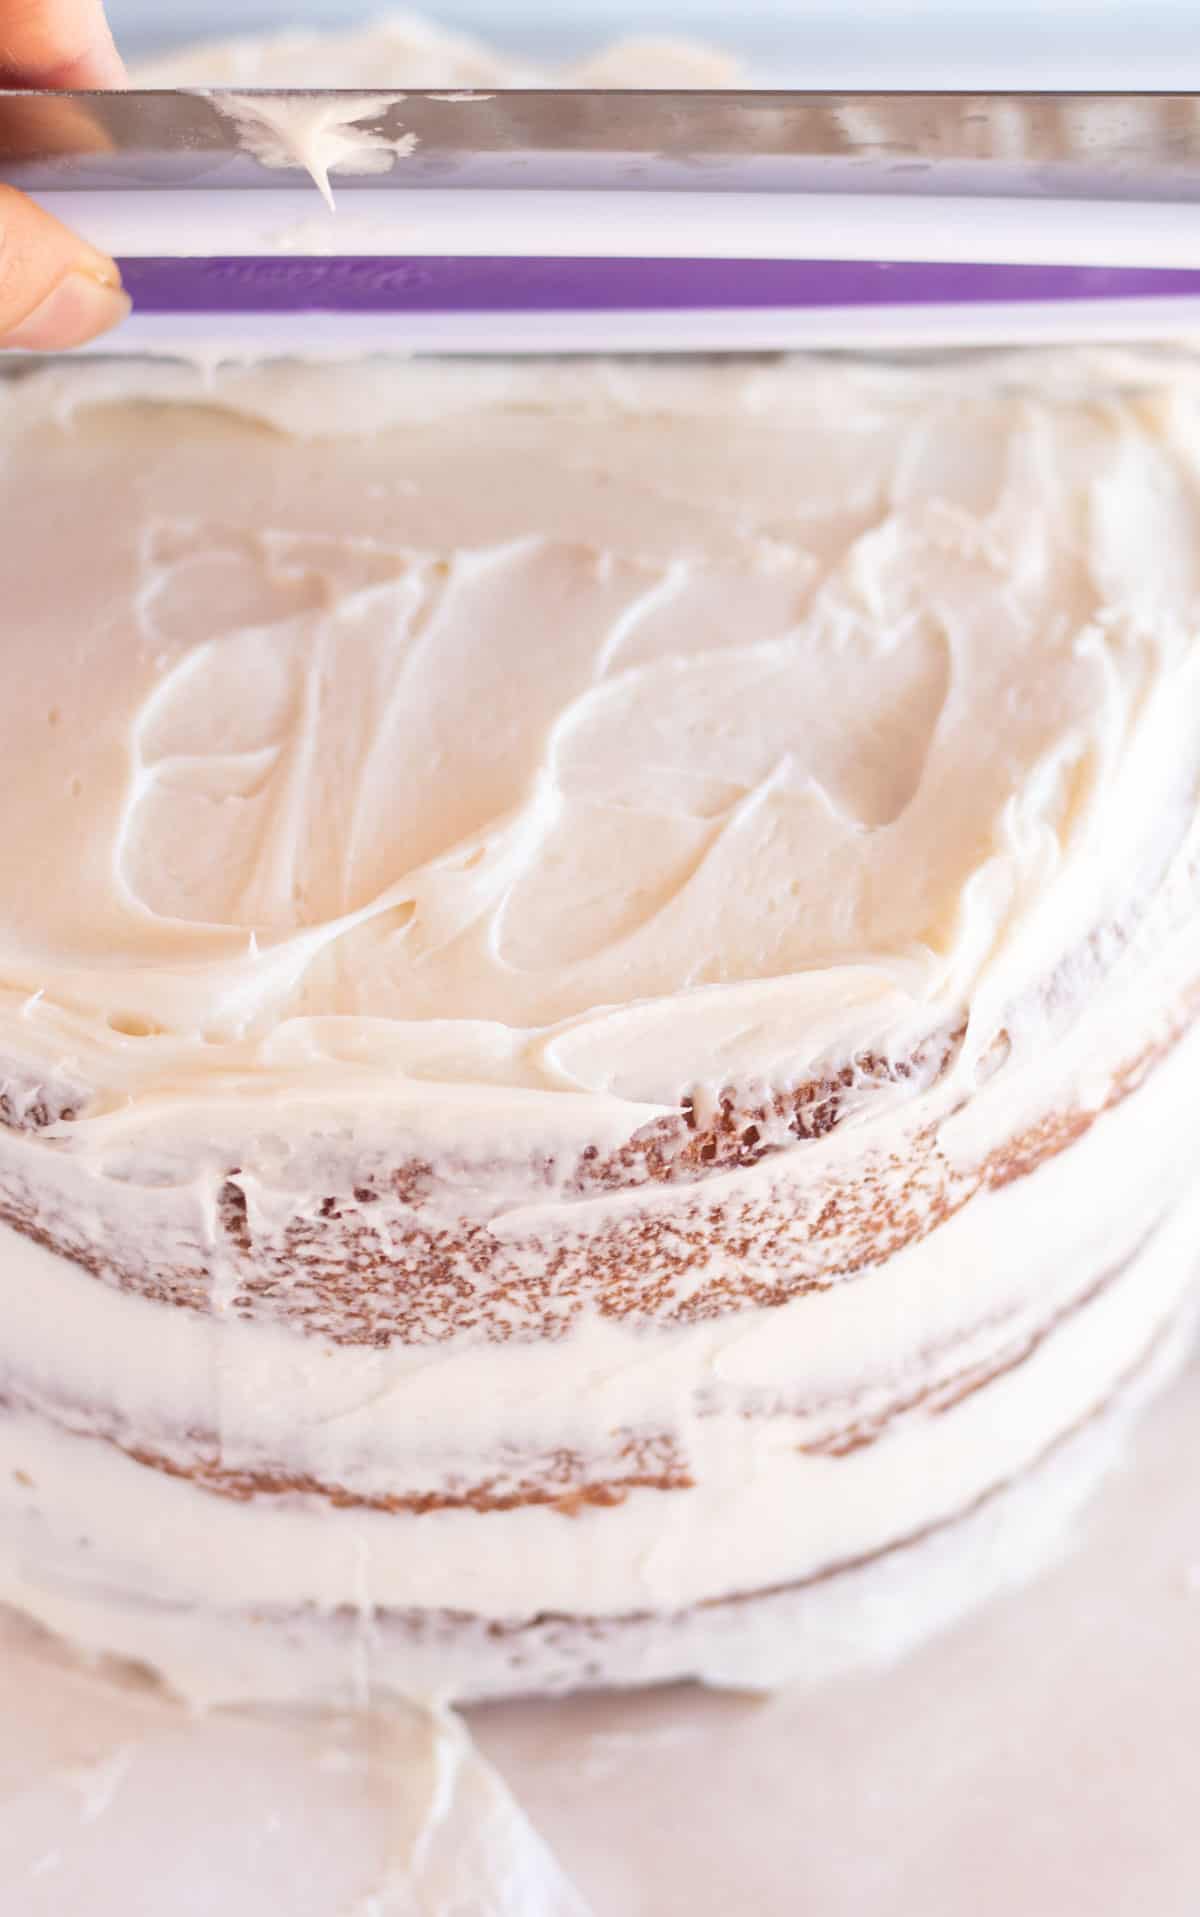
When the sides are done, you'll need to smooth out the top edge. Holding your bench scraper or spatula parallel, smooth the excess frosting inward toward the center of the cake.
Try to make a level, sharp edge. Then smooth out the top so there's not a dome from pushing the excess frosting inward.
Then gently remove the parchment paper or transfer it to your cake plate. Touch up the bottom of the cake if needed.
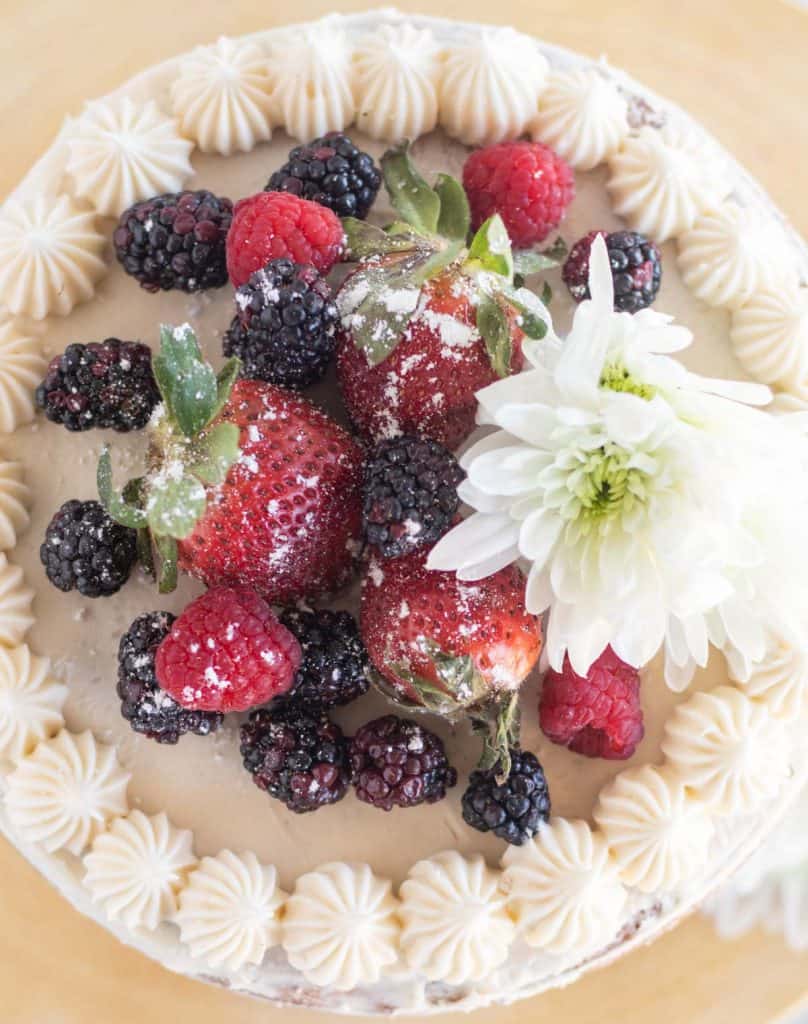
Decorate with fresh berries, flowers, herbs, sprinkles, keto chocolate, candies, cookies ...or whatever your heart desires!
I prefer to pipe a decorative edge around the top and fill the center with berries and fresh flowers (which have been thoroughly washed and dried!), then sprinkle the whole thing with some powdered sweetener.
Then, place in the refrigerator for an hour or two for the frosting to set. After it's set, you can place the cake out at room temperature for the party or gathering.
These cakes are also gorgeous with a ganache drip! Simply pour the ganache over the center of the cake and use a spatula to spread the ganache over the top.
The ganache will make beautiful drips as you spread the chocolate out over the top.
Here is my Keto Ganache Recipe that can also be made Vegan and dairy-free. I recommend slightly thinning it out with a little extra cream so it's not too thick and makes beautiful drips!
If you’ve tried this method on How To Frost A Naked Cake please let me know in the comments below!
Craving more? FOLLOW ME on Pinterest, Instagram, Facebook, YouTube, or E-Mail to find more delicious food!

How To Frost A Naked Cake Or Semi-Naked Cake For Beginners
Ingredients
Keto Cake Recipe:
Keto Frostings To Choose From:
Decoration Ideas:
- Fresh Berries
- Fresh Flowers
- Sprinkles
- Small Keto Chocolates, Cookies, or Candies
Equipment
- Cake Plate, Cake Stand, Or Turntable
- Parchment Paper or Cake Circles
- Straight Spatula or Off-Set Spatula
- Bench Scraper
Instructions
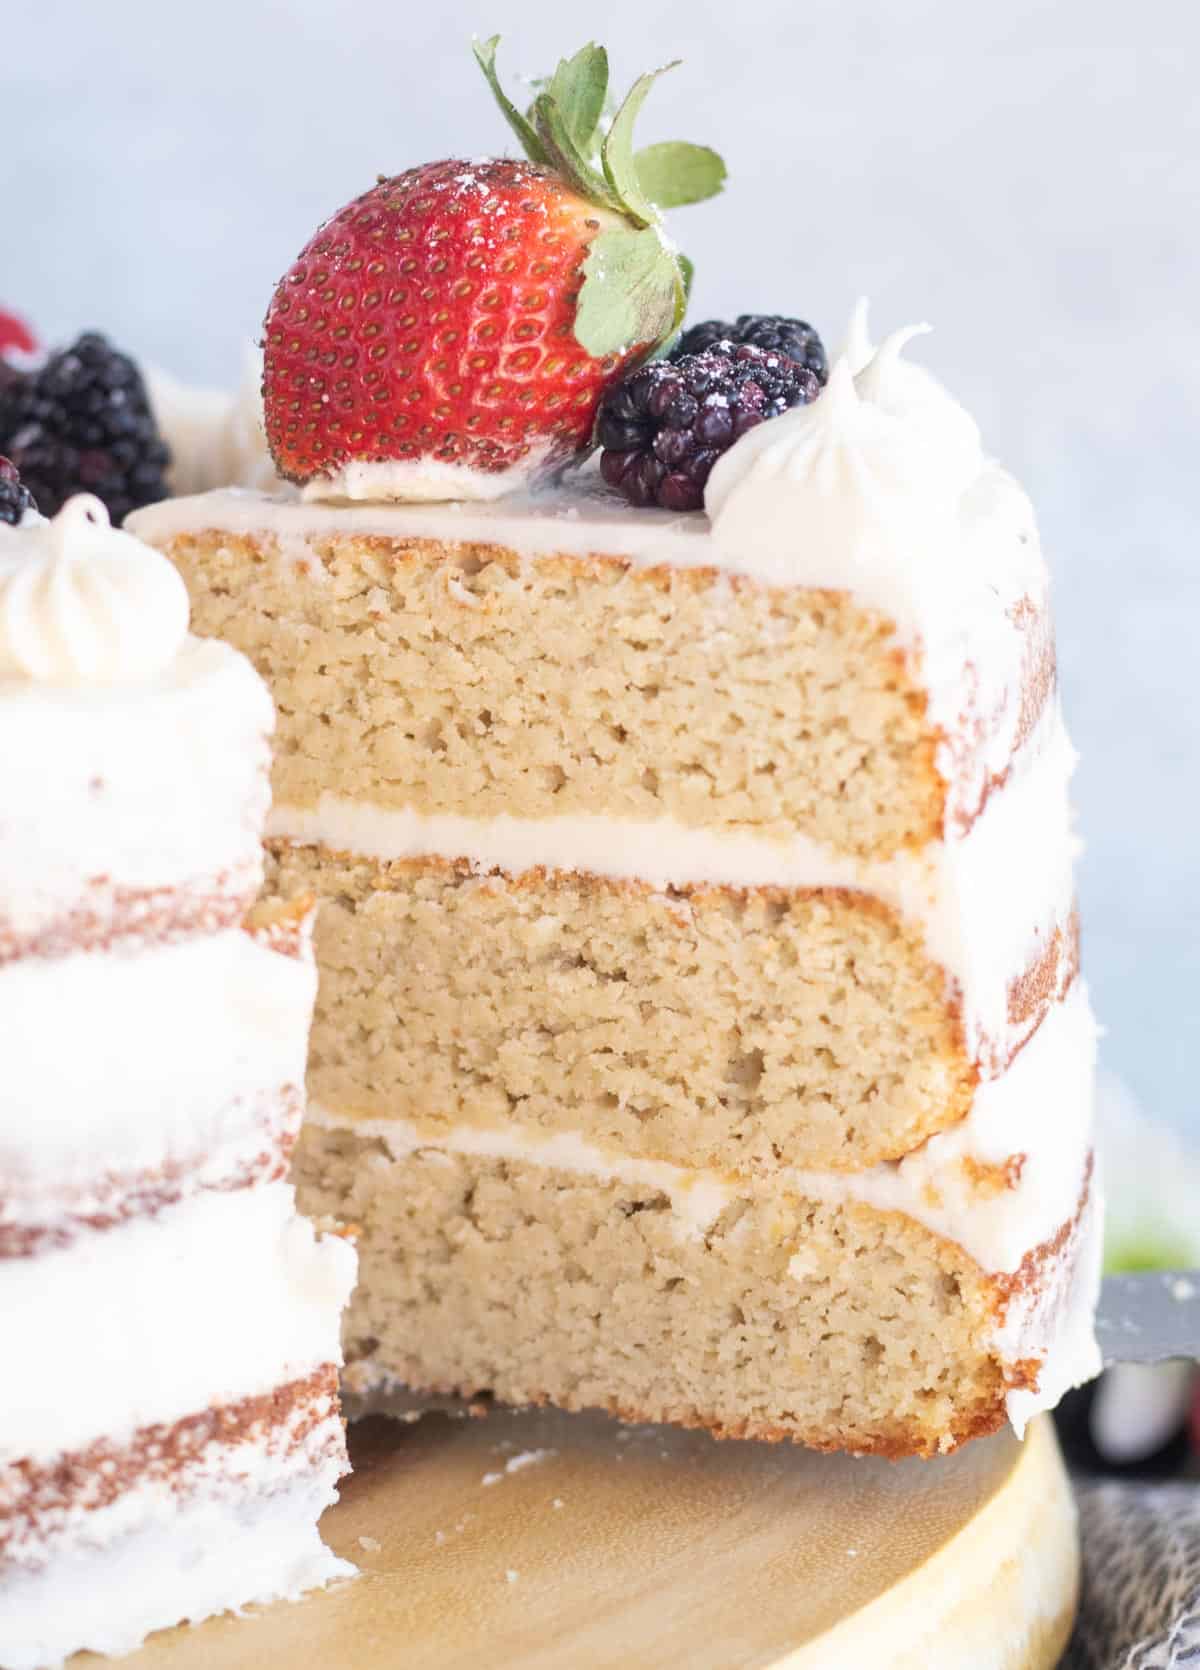
- Allow the cake layers to come to room temperature. Wrap tightly in plastic wrap and place in the fridge for at least an hour. *Note- I recommend preparing a 3-layer cake over a 2-layer cake, just because I think it shows off the beautiful layers better!
- Use a serrated knife to level off the tops of the cakes to make them level. Then, add a small amount of frosting to the middle of the cake plate, turntable, or cake stand and place the cake on top. While the frosting is optional, it helps prevent the cake from moving around while frosting. If using a turntable, place the cake layer on a cake circle for easy transfer to the cake plate. If decorating directly on a cake plate or stand, slide 4 pieces of parchment paper underneath the edges of the cake for easy cleanup.
- Pipe frosting all the way around the top edge of the cake (optional), then use a straight spatula or an off-set spatula to add frosting (around 1 to 1 ½ cups) to the top of the cake. Evenly spread the frosting over the top, filling in the circle you just piped.
- Add additional cake layers upside down for a more level cake, frosting between each layer as we did in the previous step, including the top layer. Gently but firmly press each cake layer into the frosting and ensure each layer is level. The top and bottom layers should be completely parallel to make straight sides.
- For a naked cake: Decorate the top as desired and remove parchment paper or transfer to cake stand. Transfer cake to the fridge for at least an hour or two to allow frosting to set. After it's set, you can place the cake out at room temperature for the party or gathering and serve.
- For a semi-naked cake: Use your spatula to add frosting to the sides of the cake, starting at the bottom and working towards the top. No need to be perfect, and you can add as much or as little as you prefer. Use a bench scraper to smooth out the sides of the cake until they are smooth and you have some areas of cake peeking through. Don't push too hard or you may puncture the cake. If there are areas that need more buttercream, simply add more with the spatula then smooth out with the bench scraper until you get the look you are going for. The more perpendicular you hold the bench scraper the more frosting you will scrape off. The closer you hold the bench scraper to the cake the less frosting you will scrape off and you'll get more of a smoothing effect. To smooth out the top edges: Holding your spatula or bench scraper parallel, smooth the excess frosting on the top edge of the cake inward toward the center. Try to make a level, sharp edge. Then smooth out the top of the cake so there's not a dome from pushing the excess frosting inward. Decorate the top as desired and remove parchment paper or transfer it to a cake stand. Transfer cake to the fridge for at least an hour or two to allow frosting to set. After it's set, you can place the cake out at room temperature for the party or gathering and serve.
Add Your Own Notes
Video
Notes
- Fresh berries
- Flowers (thoroughly washed and dried!)
- Herbs
- Sprinkles
- Keto chocolate, candies, cookies, etc...
- Chocolate Ganache (the linked recipe is fairly thick, I recommend thinning it out with additional non-dairy milk or cream to get long, beautiful drips!)
- Cut a very small piece off of the bottom corner of a large plastic baggie then place the piping tip into the cut corner.
- Place the baggie into a cup with the piping tip down.
- Fold the excess baggie over the outside edge of the cup.
- Add frosting.
- Remove the baggie from the cup and push the frosting towards the tip, removing any air.
- While holding the baggie straight up and down, pipe on the frosting. Easy-peasy!
NET CARBS = Total Carbs - Fiber - Allulose - Xylitol
Nutritional information is approximate and may vary. Sugar alcohols, xylitol, and allulose are included in the total carbs and fiber.
Looking for more information on the keto diet? Check out my
Comments
No Comments